Beaches of
NormandyTours
NormandyTours
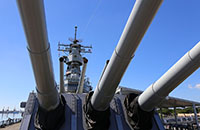
Yamamoto - Part IIThe man behind Pearl Harbor (Photo: Gaho Yakushin no Nihon) Today, we continue our article on the best-known Japanese commander of World War II: Admiral Isoroku Yamamoto, the man who planned the attack on Pearl Harbor and the Battle of Midway, and who led the Imperial Japanese Navy for much of the war. (Read the first part here) Fighting a war he did not believe his country could win, the success of his first operation against the U.S. made him the single most hated person in America, and set him on a course that would end a year and a half later, in the air, in front of the guns of American fighter planes. While Yamamoto realized that a surprise attack on Pearl Harbor would give Japan the best fighting chance, he had no illusions about the country's chance to actual win the war even with a fortunate start. When asked in mid-1941 about the outcome of a possible war against the United States, he replied that if ordered to fight, "I shall run wild considerably for the first six months or a year, but I have utterly no confidence for the second and third years." Yamamoto knew that the sheer size, population and industrial strength of the United States meant that only a hypothetical complete Japanese victory would knock America out of the war; he also believed that the Japanese government fatally underestimated the difficulty of achieving such a victory. In January 1941, he wrote to an ultranationalist acquaintance: "Should hostilities once break out between Japan and the United States, it would not be enough that we take Guam and the Philippines, nor even Hawaii and San Francisco. To make victory certain, we would have to march into Washington and dictate the terms of peace in the White House. I wonder if our politicians [who speak so lightly of a Japanese-American war] have confidence as to the final outcome and are prepared to make the necessary sacrifices."  Left to right: battleship Kirishima, carrier Kaga and battleship Hiei three days before departing to attack Pearl Harbor Writing the letter was a mistake. The quoted part, minus the last sentence which points out his doubts, was spread by militarists as "proof" of Yamamoto's confidence in victory. Almost a year later, ten days after Pearl Harbor, a Japanese propaganda broadcast intended for domestic consumption was intercepted and translated into English. The broadcast further twisted Yamamoto's original words to their exact opposite: “Any time war breaks out between Japan and the United States I shall not be content merely to capture Guam and the Philippines and to occupy Hawaii and San Francisco. I am looking forward to dictating peace to the United States at the White House in Washington.”  Caricature of Yamamoto on the cover of TIME magazine two weeks after the attack on Pearl Harbor Though he had no faith in victory, Yamamoto oversaw the development of the plan against Pearl Harbor, which he felt gave Japan the best opportunity. It was inspired by a then-recent event, the British aerial attack against the Italian fleet at Taranto in November 1940, the first anti-ship strike by carrier-borne aircraft. (Read our earlier article)  Crewmen placing mattresses on the island of the carrier Akagi for additional protection while the ship is en route to Pearl Harbor. The Zero in the foreground has a quilted engine cover to protect it from the weather The attack on Pearl Harbor began before dawn on December 7, 1941, and achieved complete surprise. 353 aircraft taking off from six carriers devastated their targets. 2,400 men (mostly soldiers) were killed, and close to 2,000 others wounded; 347 American aircraft were destroyed or damaged; four battleships sunk and another four (plus several smaller vessels) damaged. Japanese losses were 129 men killed and one captured, 29 aircraft destroyed and 74 damaged and a few midget submarines lost. It is often claimed that Yamamoto commented on the attack with the declaration "I fear that all we have done is to awaken a sleeping giant and fill him with a terrible resolve." As far as it can be determined, he never actually said or wrote that, and the quote was invented for the 1970 film Tora! Tora! Tora!  The USS West Virginia burning during the attack What is true, however, is that one particular part of the attack proved to be a failure, and one that became critical to the further course of the war: the American carriers were out at sea and avoided the attack. The carriers were commanded not by Yamamoto himself, but by Vice Admiral Chūichi Nagumo. Most of the damaged Japanese planes were dive and torpedo bombers, and while Nagumo knew that the U.S. Navy carriers were still out there, he felt he didn't have enough suitable planes left to go after them or to launch further waves against vital land facilities. Yamamoto privately lamented Nagumo's decision to withdraw, but adhered to Japanese command culture and did not publicly criticize or punish the commander who had to make decisions on the spot. As we know from history, the attack proved counterproductive in the long run, as it drew the United States into the war and galvanized a previously divided population in support of the war effort.  Vice Admiral Chūichi Nagumo, the direct commander of the attack on Pearl Harbor, on the bridge of the Akagi while enroute to Hawaii True to his earlier declaration, Yamamoto and his subordinates ran wild across the Pacific for months, pushing back American, British and Dutch forces everywhere. The string of successes lasted until March 1942, at which point Japan had to take stock of the situation and settle on a new strategic goal. Grandiose ideas included invading Australia, India or Hawaii, though all of these were discarded either because the Army was bogged down in China and couldn't spare enough soldiers, or because the Navy lacked the transport capacity to support an invasion over an extremely long range. Eventually, the new strategic goals were to push into Burma and hope that Indian nationalists would rise up against British rule, and also to secure the Solomon Islands and New Guinea to drive a wedge between Australia and the United States. Yamamoto advocated a second major strike against the remaining U.S. fleet in the east, but could not gather enough support.  Admiral Yamamoto on deck, 1942 Events, however, took a new turn on April 18, 1942. The Doolittle Raid (Read our earlier article), a mission planned and lead by Lieutenant Colonel James Doolittle, hit several targets in Japan in a successful effort to raise American fighting spirit by proving the Japan was not invincible. The attack shocked Japan and made them realize that the U.S. Navy was still a serious threat. The event rallied Japanese leadership behind Yamamoto's insistence on a second major clash with the U.S. Pacific Fleet. That clash would become the Battle of Midway, but would not go the way Yamamoto planned it.  Jimmy Doolittle taking off on the Doolittle Raid to Japan The Midway Atoll, 1,300 miles (2,060 km) northwest of Pearl Harbor, was an important refueling stop for both the U.S. Navy and transatlantic flights, and was considered the second most important location for the safety of the West Coast. Yamamoto's plan was to attack the place and force the Pacific Fleet to sail out to defend it – and head straight into a trap. The Mobile Force, consisting of four carriers, two battleships, three cruisers and 13 destroyers, would destroy the air force stationed on Midway, then Second Fleet (one light carrier, two battleships, 10 cruisers, 21 destroyers and 11 transports) would land 5,000 soldiers to secure the island. The U.S. Pacific Fleet rushing to relieve the atoll would sail right into an ambush, and the First Mobile Force would deal the American carriers a crippling blow. After that, a third unit, the First Fleet (one light carrier, three battleships, one light cruiser and nine destroyers), along with parts of the Second Fleet, would mop up the remaining U.S. ships.  Midway Atoll a few months before the battle The ambush depended on the U.S. carriers arriving exactly at the time and in the place when and where they were expected, and Yamamoto ordered two measures to ensure they would. The first was a long-range reconnaissance flight by flying boats from the Marshall Islands over Pearl Harbor to verify that the carriers were indeed there. The second was a picket line of submarines position to the east of Midway, which would detect the approaching U.S. fleet and alert Japanese forces. Things with Midway went wrong for the Japanese from the get-go. The operation coincided with the invasion of the Aleutian Islands off Alaska (historians still disagree over whether this was a deliberate feint to draw some U.S. forces away from Hawaii and Midway, or a protective measure against future U.S. offensives). The battle in the north took ships away from the effort at Midway, weakening the more important operation.  The Japanese heavy cruiser Mikuma sinking during the Battle of Midway The second problem was with the recon flight. Earlier Japanese nuisance raids along the same route had already alerted the U.S. Navy to a location called French Frigate Shoals, which was where the Japanese flying boats stopped for refueling. As a result, the flight heading for Pearl Harbor on May 30 found an American minesweeper at the shoals. Unable to refuel, they turned home and were incapable of ascertaining the location of the American carriers.  A Coast Guard radio navigation station built at French Frigate Shoals after the Battle of Midway The third glitch affected the submarine picket line, which failed to get to their positions in time. This part of the operation was commanded by a relative of the emperor, and it would have been impossible to raise a complaint. The last and most important setback for Yamamoto was that the Americans already knew he was coming. Unknown to the Japanese, their naval communications cipher was already partially solved by U.S. codebreakers. Codes for specific locations were not understood yet, but it was clear from intercepted messages that a major offensive was brewing either against the Aleutian Islands or Midway. One code breaker arranged for a fake emergency, the failure of water desalination systems on Midway, to be broadcast unencoded. This was predictably intercepted by the Japanese, who, in turn, sent a radio message for the invasion fleet ordering them to pack extra desalination equipment. This message, once intercepted by the Americans, proved that Midway was the target.  Station HYPO on Hawaii, the signals monitoring and cryptographic intelligence unit where a fake emergency was devised to confirm Midway as the Japanese target Informed of the attack, the U.S. force sailed out well in advance. Their absence at Pearl Harbor went unnoticed due to the cancellation of the recon flight. They passed through the planned Japanese submarine picket line before the submarines could get there due to the tardiness of the latter. Knowing that Midway was the main target for the Japanese, only a small U.S. force was sent to the Aleutians, allowing most of the fleet to concentrate on Yamamoto's forces.  Japanese carrier Hiryū avoiding a bombing run by a B-17 Flying Fortress during the Battle of Midway Yamamoto planned to set a trap, but he ended sailing into one himself on June 4, 1942. His carriers were ambushed by Admiral Nimitz's own carriers, and all four Japanese fleet carriers (and some other ships) were sunk, at the cost of one American fleet carrier and a destroyer. The Japanese battleships, which couldn't keep up with the carriers, were lagging far behind and could not join the battle in time. The loss of the carriers meant the loss of Japanese initiative in the Pacific for the rest of the war.  Japanese prisoners of war on Midway after they were rescued from a lifeboat two weeks after the battle The Japanese defeat at Midway was bad, but the country was still in the fight. Yamamoto lost face, but he remained in his position, as removing him would have been a blow against the morale of the Combined Fleet. Naval General Staff refused to gamble on any more risky offensive operations, forcing Yamamoto to go back to Japan's original plan for the war: looking for a decisive defensive battle. Under Yamamoto's command, the Imperial Japanese Navy (IJN) continued to fight numerous smaller battles across the Pacific, causing losses to the U.S. Navy, but also sustaining losses they themselves could not afford in the long run.  Japanese fighters and dive bombers preparing to launch during the Battle of the Santa Cruz Islands When American forces started to move onto Guadalcanal, Yamamoto fought several battles, commanding two of those personally, to dislodge them. These confrontations were timed to coincide with Army offensives on the island, and caused significant American casualties, but the Japanese Army repeatedly failed to capitalize on the opportunities, which eventually led to Japan retreating from Guadalcanal.  A Japanese D3A dive bomber shot down directly over the carrier USS Enterprise during the Battle of the Eastern Solomons (Photo: U.S. Navy) After the loss of Guadalcanal in February 1943, Yamamoto decided to go on an inspection tour of various Japanese positions in the Pacific to boost flagging morale. On April 14, U.S. naval intelligence intercepted and decrypted the flight itinerary of one leg of this tour. Yamamoto was scheduled to fly from Rabaul to a small island near Bougainville in the Solomon Islands on April 18. It's been speculated but never proven that President Roosevelt might have personally authorized Secretary of the Navy Frank Knox to "get Yamamoto." What we do know is that Knox let Admiral Nimitz make the final call on the idea, and Nimitz decided to go for it one day before the flight. The mission to kill Yamamoto was codenamed Operation Vengeance.  The last known photo of Yamamoto (left), saluting pilots shortly before embarking on his final flight On the morning of the 18th, local commanders afraid of an ambush urged Yamamoto to cancel his trip, but he insisted on sticking to the plan. The flight of two Mitsubishi G4M bombers used as fast transports and six escorting A6M Zeroes was attacked by 16 P-38 Lightnings (Read our earlier article), the only U.S. fighters in the region with enough range to intercept the flight, and which have reached the interception point one minute before the Japanese planes arrived. (In fact, this mission is considered the longest-range fighter-intercept of World War II.) The flight originally consisted of 18 planes, but two had to drop out early due to technical problems. The American pilots were only expecting a single bomber, and didn't know which of the two was carrying Yamamoto. They managed to shoot down both, with one falling into the jungle, the other into the sea. A Japanese search party found the plane in the jungle the next day, along with Yamamoto's body. According to their notes, the admiral was thrown clear of the wreckage along with his seat, and landed in an upright position under a tree, his hand still gripping his sword. He was hit by two machine gun rounds from the attackers, and died from a head wound before the plane crashed.  The tail of the crashed bomber that was carrying Yamamoto Yamamoto's death raised spirits of America, but not quite so much in Britain. Neither British intelligence officials nor Winston Churchill had the same visceral hatred of Yamamoto as the Americans. They felt that the mission, intercepting a flight deep in Japanese territory with uncanny accuracy, risked revealing the fact that Japanese codes had been broken, and that Yamamoto was not a sufficiently valuable target to justify that risk. Another controversy around Yamamoto’s death was the identity of the man who actually shot his plane down. The two pilots who attacked the bomber were Captain Thomas G. Lanphier and Lieutenant Rex T. Barber. Lanphier claimed to have shot down Yamamoto’s plane and a Zero, while Barber downed a third bomber that also crashed in the jungle. (Now we know there were only two bombers, and only Yamamoto’s crashed on land.) No proper debriefing took place after the mission, and Lanphier and Barber were given shared credit for the kill. Several of the pilots who went on the mission had doubts about the veracity of Lanphier’s claim, and post-war Japanese sources revealed that no Zeroes were shot down, putting the accuracy of Lanphier’s description of the events into question. Barber was initially content with sharing the credit with Lanphier, but changed his mind and unsuccessfully requested a revision later, when he learned that Lanphier was writing a book in which he claimed to be the sole pilot responsible for kill. Based on the examination of the wreck and the shell impacts on it, as well as a careful reconstruction of aerial maneuvers, most present-day historians agree that Yamamoto’s plane was most likely shot down by Barber.  The pilots who carried out Operation Vengeance (with one missing; Lieutenant Hine was Missing In Action) Yamamoto's death was kept a secret from the Japanese public for a month; the eventual announcement stated he "engaged in combat with the enemy and met gallant death on a war plane." His remains were cremated in New Guinea and returned to a state funeral in Tokyo aboard the battleship Musashi, his last command and sister ship to the Yamato. He was posthumously promoted to Marshal Admiral, the highest rank in the Japanese Navy, and was awarded both Japan's highest decoration, the Order of the Chrysanthemum, and Germany's equivalent, the Knight's Cross of the Iron Cross with Oak Leaves and Swords. If you would like to learn more about the currents of history that led to the attack on Pearl Harbor, the details of the “day of infamy,” and America’s entry into World War II, join us on our Pearl Harbor Anniversary Tour!  The grave in a public cemetery where some of Yamamoto’s ashes are buried. The rest of his remains are in his family’s ancestral cemetery. |


Beaches of Normandy ToursBand of Brothers Tours48 Rue de Thouays, 50480 Sainte-Marie-du-Mont, Normandy, France
Phone: +1 855-473-1999Monday - Friday, 10am - 6pm ETe-mail: info@beachesofnormandy.com